
Dear Jane,
I finished this block several weeks ago but never got around to posting it.
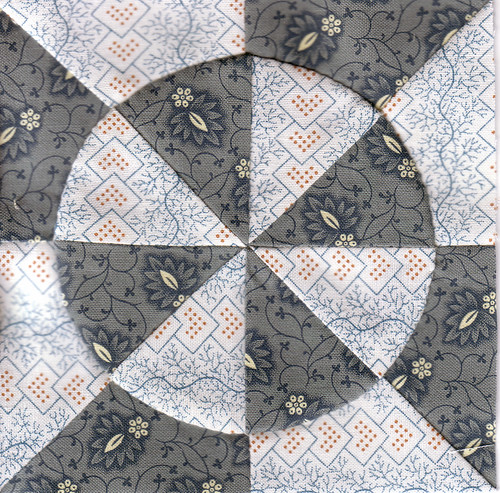
Technique:
I did this method on B3 and on B2.
1. I paper pieced two identical blocks. I make them a little bigger than I need so that I can trim everything down to size when I’m done.
2. I traced the circle onto freezer paper.
3. I took one of my four patch blocks and, placing the shiny side of the freezer paper on the WRONG side of the four patch, I ironed it in place.
4. I basted the raw edges under, sewing through the fabric and the freezer paper. At this point, you should have a nice looking circle that’s ready to be appliquéd down to the background four-patch. I love this freezer paper basting method–so precise!
5. Making sure to line up the seams of the circle to the seams of the four-patch, I appliquéd the circle down. I actually sewed the circle in place at the seams first to make sure that everything remained lined up. I then appliquéd the rest of it. Now, you have two options when doing the appliqué. You could leave a little opening, take out your basting stitches, and using a little pair of tweezers or hemostats, extract your freezer paper through the opening. You’d then finish appliquéing the circle down. OR, you could appliqué the whole thing down, leaving the freezer paper inside. Remove the basting stitches, turn the block over, and cut away some of the background block directly behind the circle, leaving 1/2″ allowance behind the circle. This removes some of the bulk of the block and gives you access to the freezer paper, making it really easy to remove.
